Using a route planner/route optimization software like OptimoRoute is easy. Within minutes you can have the most optimized/shortest routes, with schedules for your team, regardless of your starting location, drop-off points, or ending locations.
Start Planning Routes in 5 Steps
Open up OptimoRoute and follow the steps below to start optimizing routes and schedules!
1. Start planning
To plan your routes, start by clicking on the Plan Routes button. You will be presented with the Planning Settings window where you can adjust the drivers and vehicles that will be used for this route plan.
Allowed changes allows you to modify orders in 3 different ways:
- Allow all changes to the current solution – all changes will be allowed to the current routes .
- Keep planned Routes unchanged and add new Orders to unused Drivers – routes that are already planned will remain unchanged and any additional orders will be added to drivers without routes. .
- Keep Drivers/Vehicles for planned Orders and fit in new Orders – allows adding orders to an existing route without interfering with the orders that are already assigned to each driver.
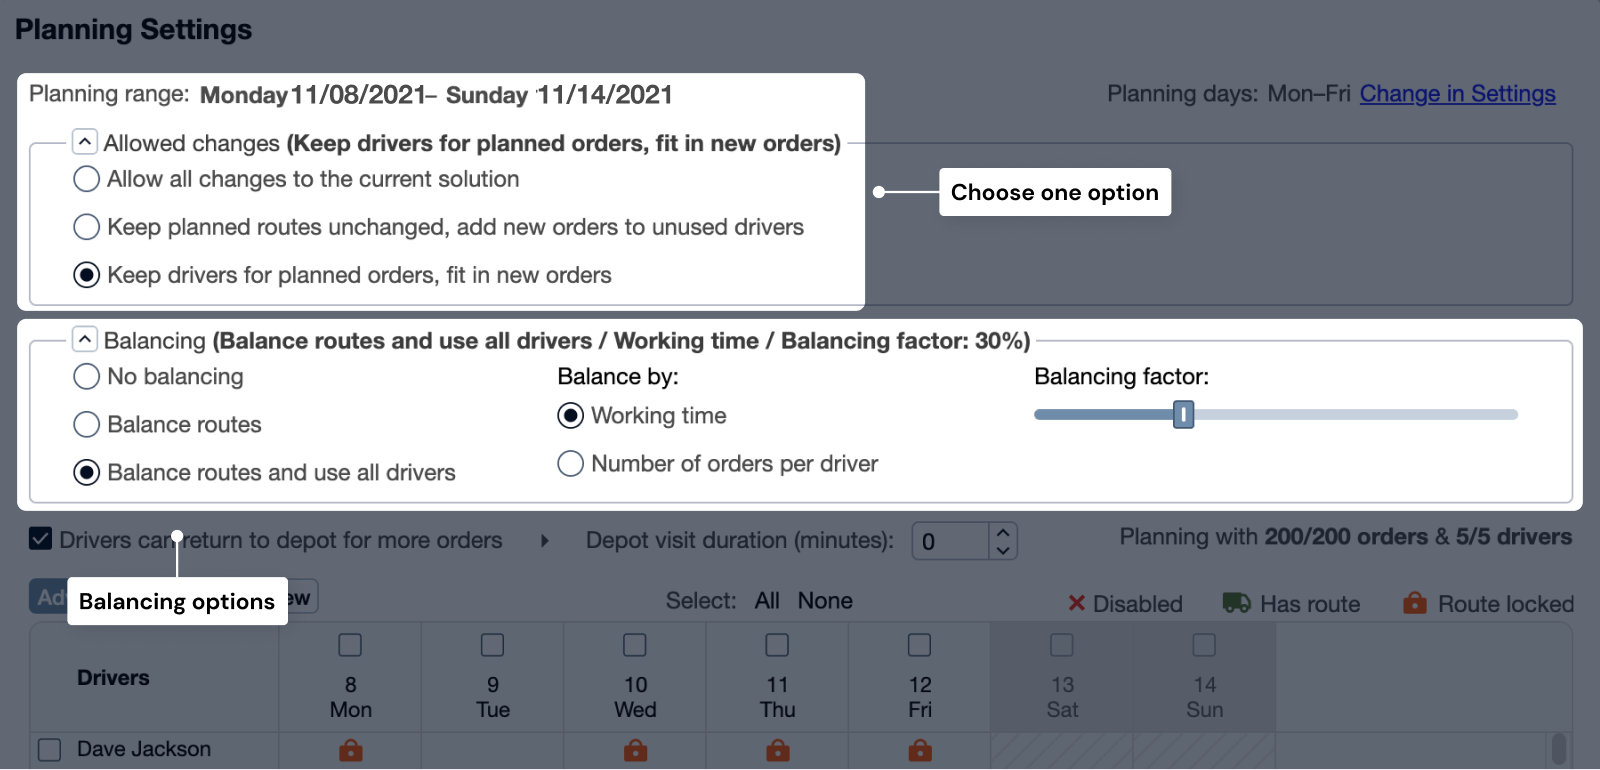
2. Balance routes
You can balance your routes in 3 different ways:
- No balancing: This creates the best routes, but some drivers may not be used at all
- Balance routes: Balance the workload between drivers (hours/driver or loads/driver), some drivers may not be used
- Balance routes and use all drivers: Balance the workload between all available drivers (hours/driver or loads/driver)
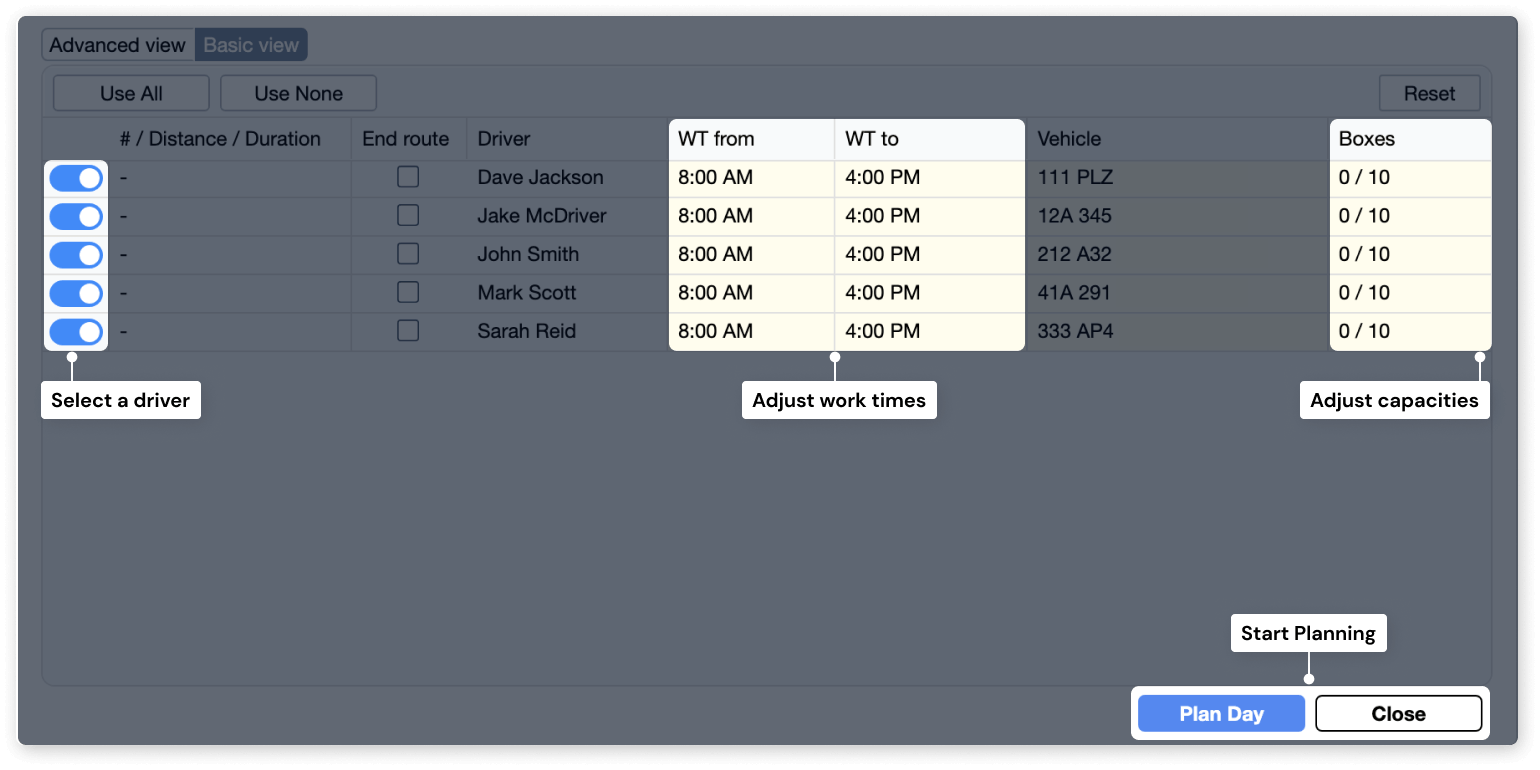
If necessary, you can adjust: which driver(s) is/are included in the route planning, the maximum number of orders assigned to drivers, their work time, and which vehicle they will be driving. You also have the option of using a scale bar to determine the balancing factor among your drivers.
3. Clustering
If you wish to activate the Clustering option, drivers can be separated into their own areas. This allows you to see a more visually organized depiction of the drivers’ routes.
4. Set return options
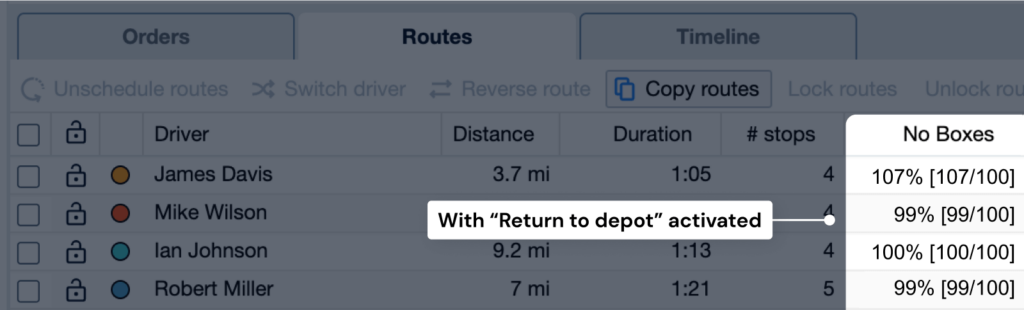
When the ‘Drivers can return to depot for more orders’ option is activated, any driver that needs to restock their vehicle will automatically have a stop planned in their route in order to do so. You can also select the number of minutes your driver will need to spend at the depot for reloading. The information will now show the constraints of the vehicle have been exceeded, however, this is only to show how many extra packages will be delivered by that driver.
5. Plan routes
To start the planning process, click on the Plan Routes button. In a very short time, OptimoRoute plans the most efficient routes and schedules them in accordance with your constraints, such as:
- Assigned drivers,
- Driver work times,
- Driver breaks,
- Delivery/service time windows,
- Vehicle load capacity,
- Driver skills and,
- Vehicle features.
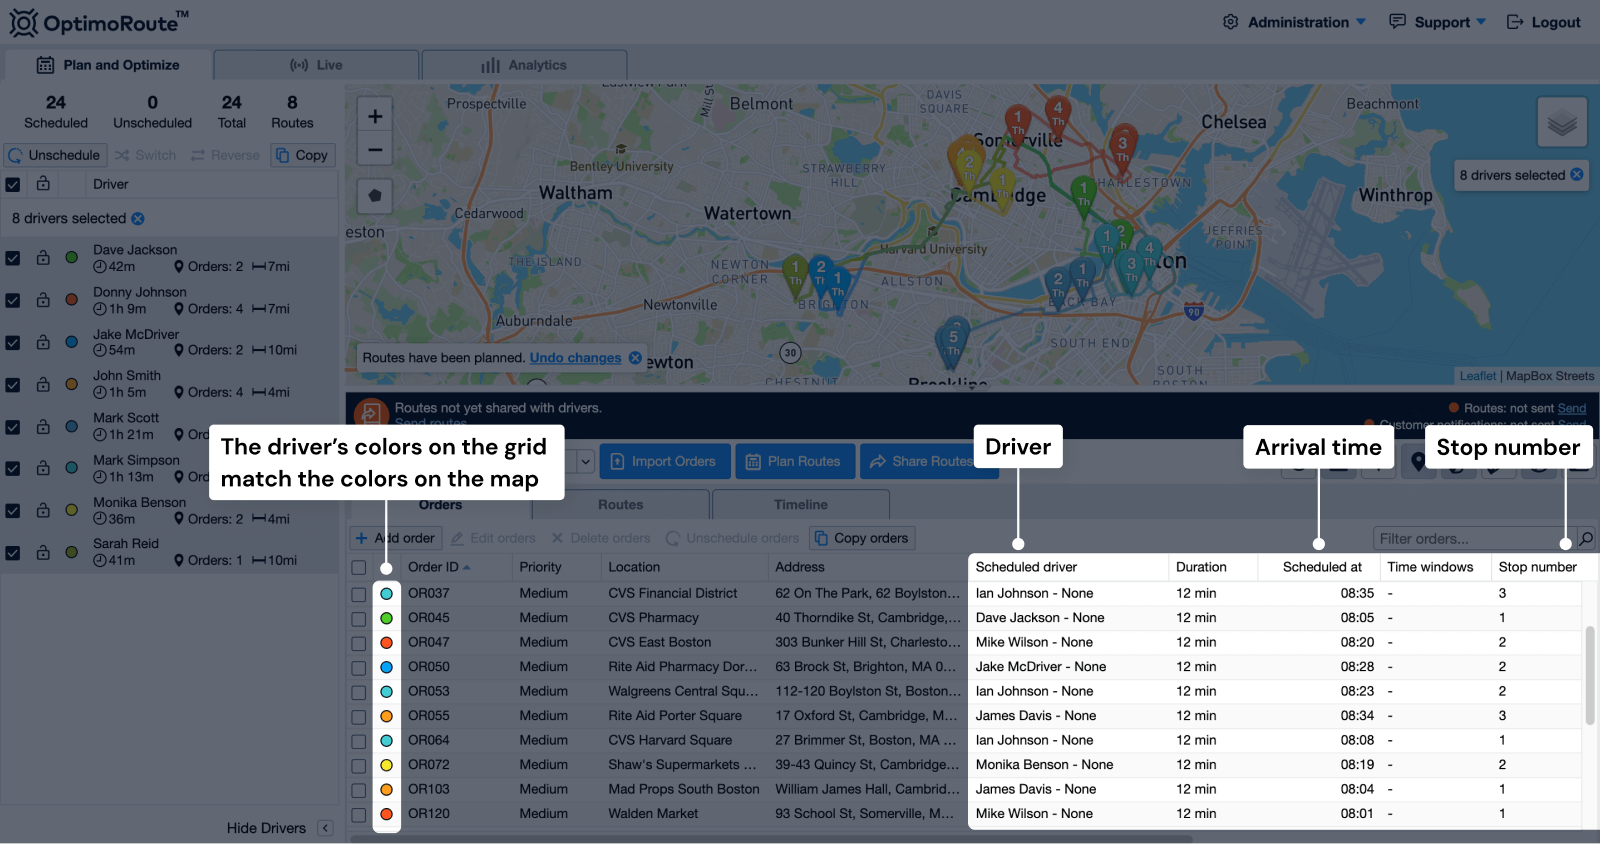
The system will maximize the number of orders served and minimize the total cost.
When you’re planning your routes, you’ll have the option of seeing either a Basic View of your plan, or an Advanced View.
In Basic View you can see standard order information, such as driver names, vehicles, Time Windows, capacity information, distance, and duration. Basic view is used to plan for a single day.
In Advanced View you can make changes such as what hours or days drivers are available to work. You can also “lock” their schedules in order to secure their route. Advanced view will allow planning for multiple days/weeks at once.
The resulting route plan is displayed on the map. Each route is displayed in a different color and the numbers in the markers show the stop sequence. The results can also be reviewed in the orders table – for each order, the system displays the performing driver/vehicle, the stop number, the planned time for the driver to arrive at the customer location.
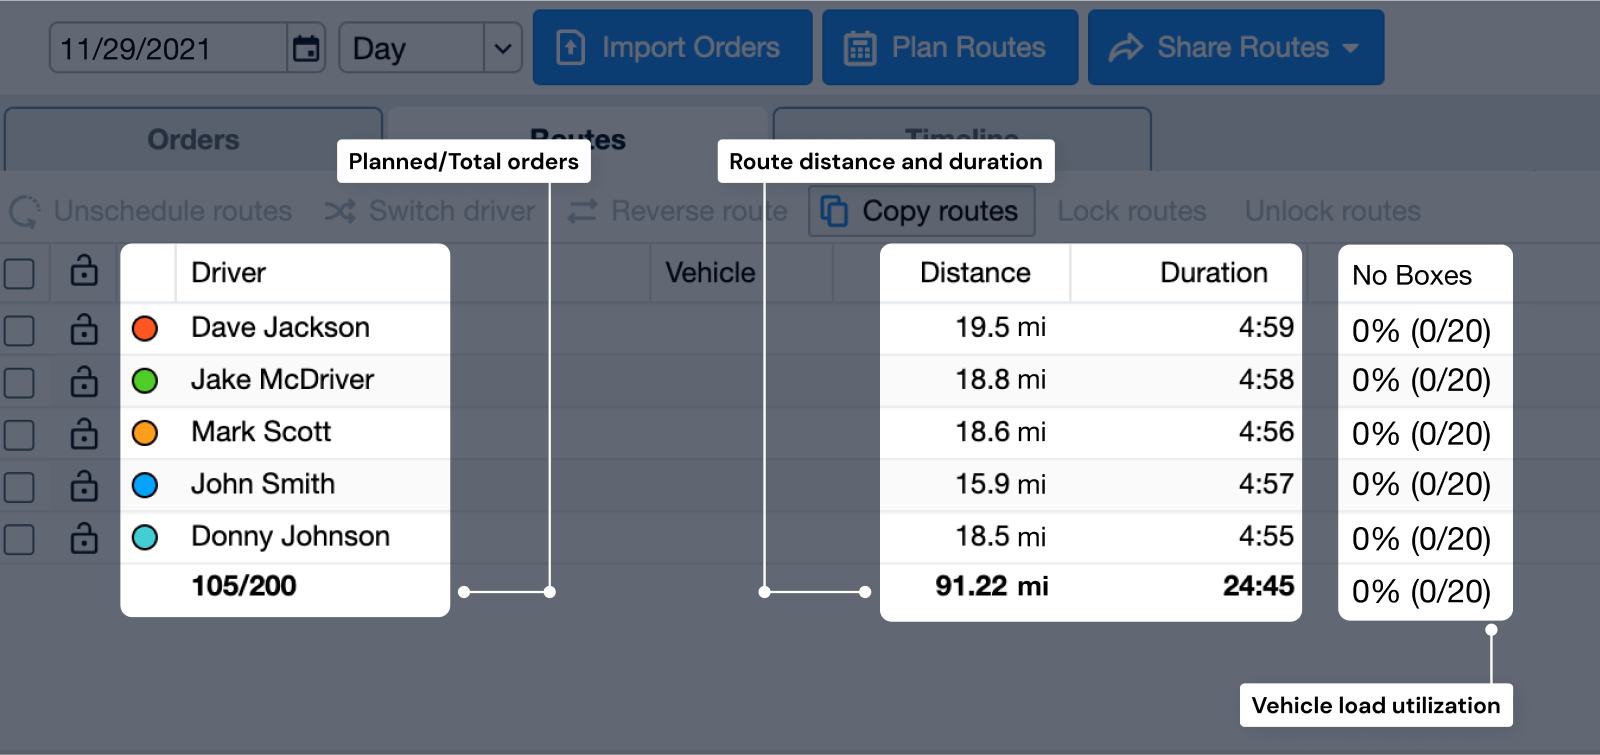
In the Routes tab you can see the following information:
- Planned distance each driver/vehicle will be driving
- Planned duration for each route
- Vehicle load utilization
If necessary, the route plan can be changed manually before exporting.
TIP After you’ve planned your route, if you want, you can send your customers notifications so they can keep track of their orders in real time. To learn more, click here.
TIP There is also the option of confirming the completion of the orders on the route by activating the Proof of Delivery feature.