If you want to fine-tune your orders or tasks, our Drag & Drop Timeline functionality allows you to manually edit your routes by choosing which orders go where. Alternatively, you can use “best fit” which allows you to choose an order or set of orders and add them to your team member’s route in the most suitable location using OptimoRoute’s optimization algorithm.
Using Drag & Drop Timeline
To begin, you can work with the orders you already have in your system, or import new ones via copy / paste or by uploading a file. Once you have your data, by clicking on the “Plan Routes” button, the software will automatically generate an initial route plan based on the provided information. Planning a route is not a requirement for using the Drag & Drop feature, you can also schedule orders directly from the timeline.
Access the Drag & Drop Timeline
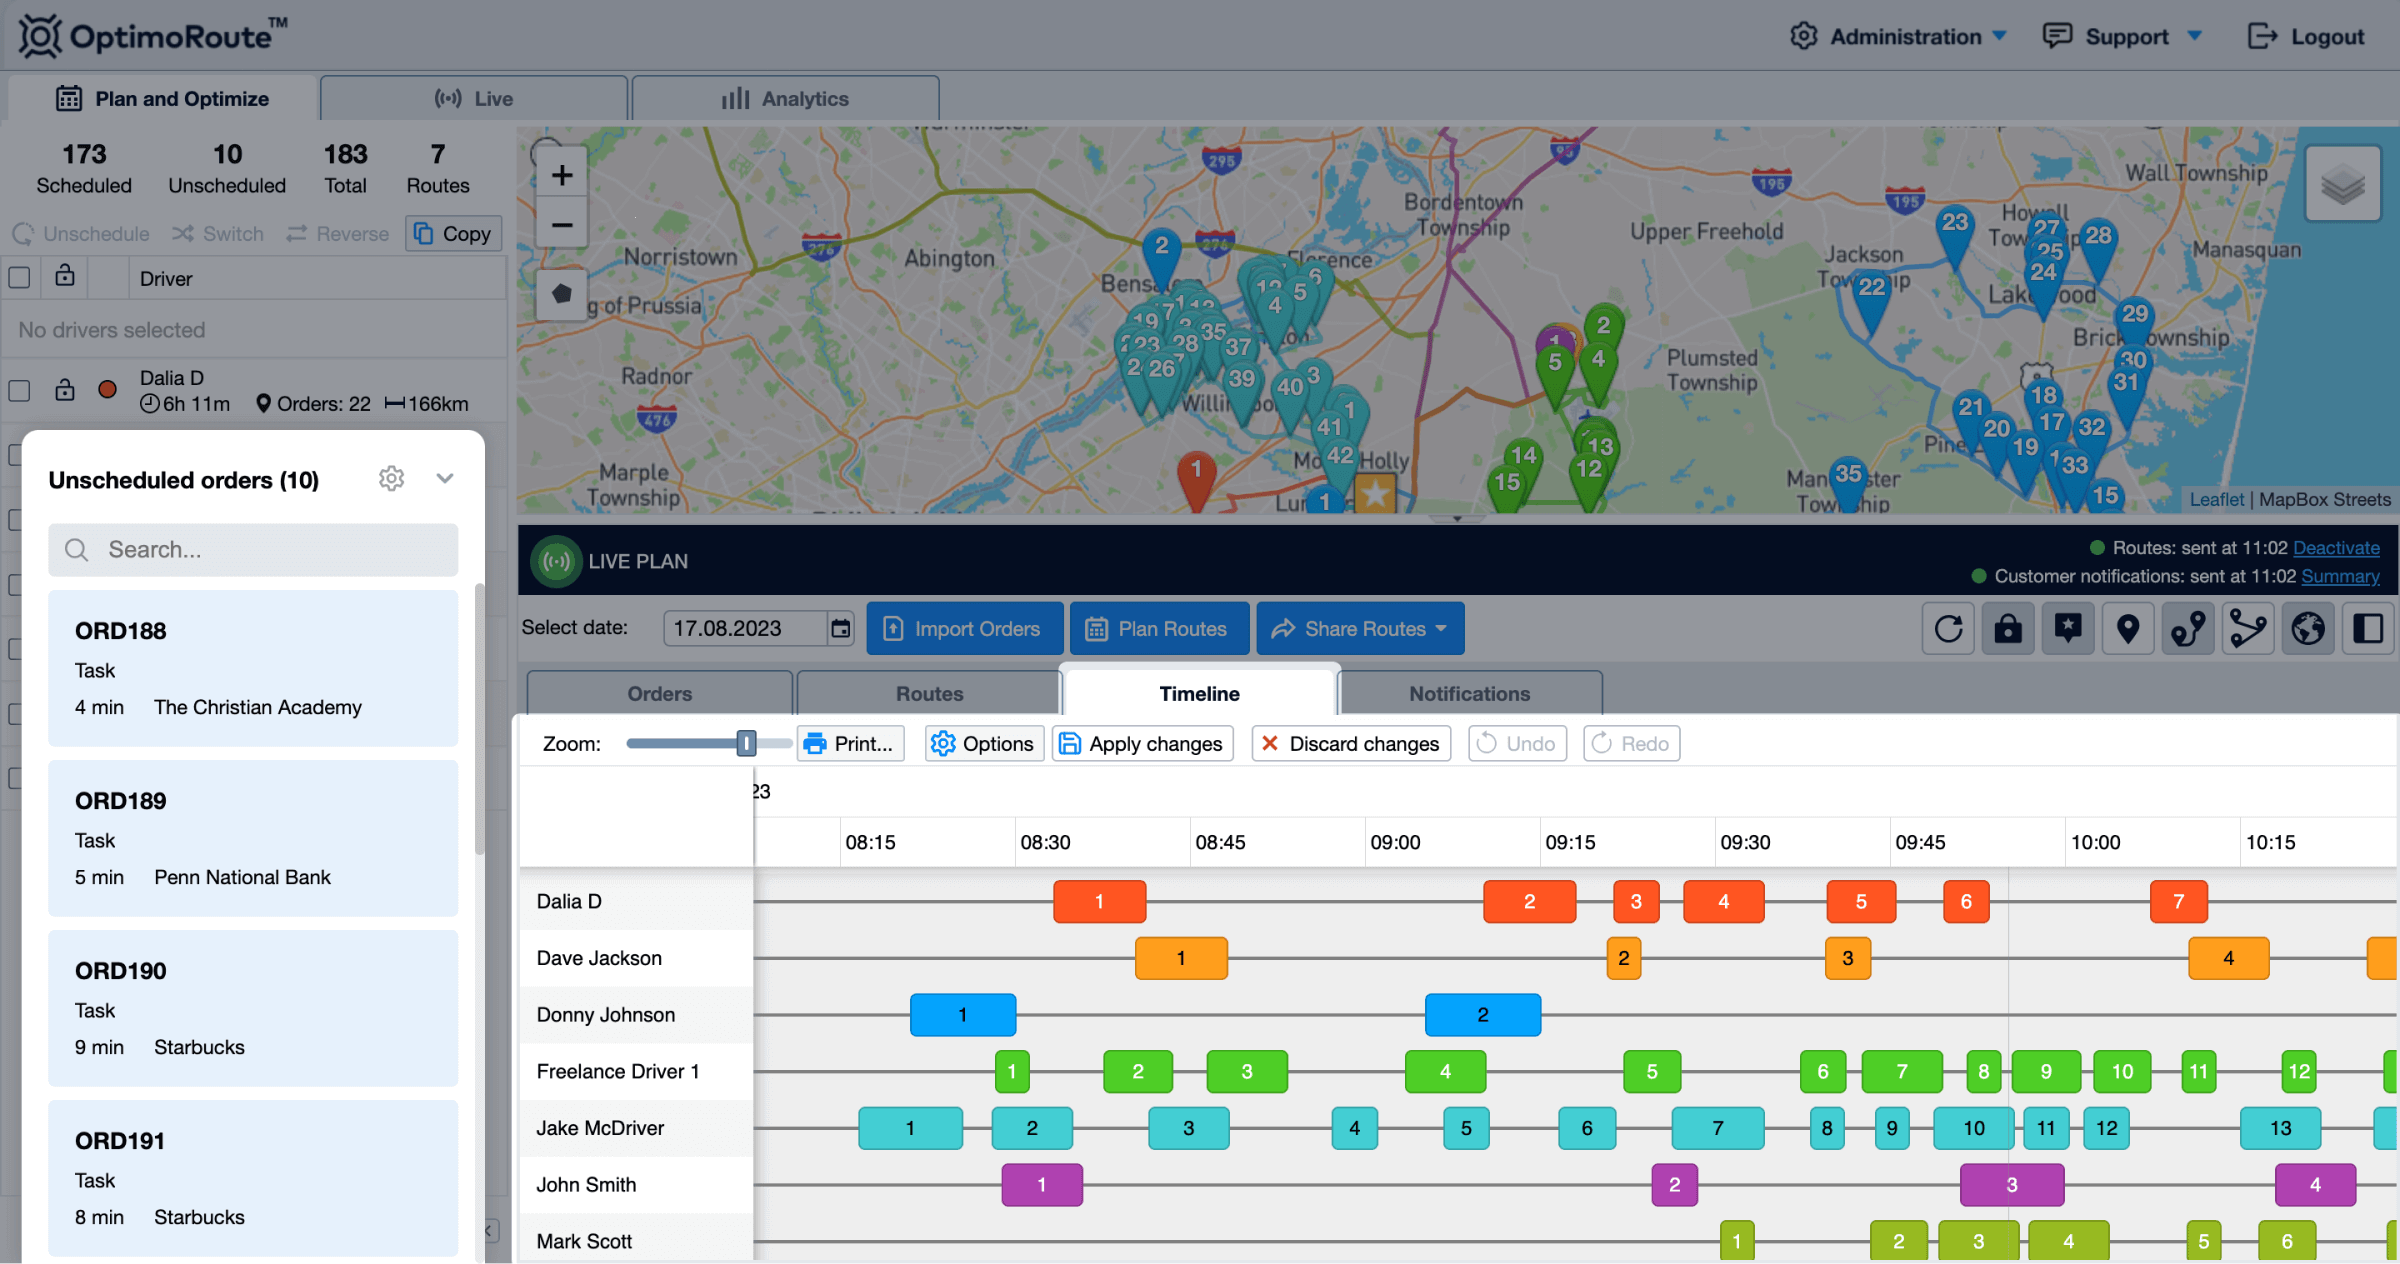
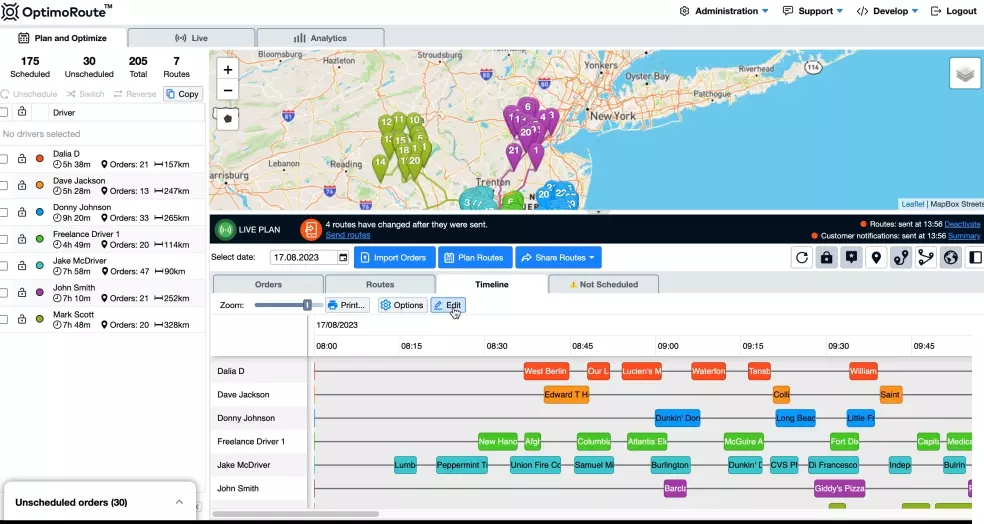
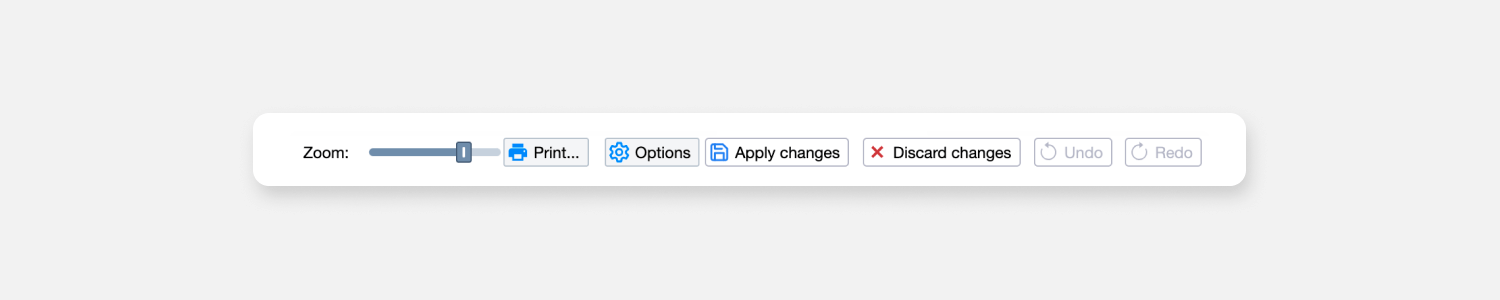
Click on the timeline tab in the main grid area to access the drag and drop functionality. You will see a visualization of all the routes, color-coded by team members. The timeline will show each order or job as a separate box (grouped orders will show up as connected boxes), positioned according to their designated time windows. Each line represents each team member’s route. If you wish to exit the edit mode without making any changes, click on the “Discard changes” button.
Analyze and adjust
Identify areas where you want to make adjustments. To make changes to your routes, simply click and drag an order / job to a new position on the timeline. This action will update the order of deliveries or services, and the software will recalculate the route accordingly. You can also drag to a different driver / technician if needed.
Modify simultaneously
Another advantage is that more people can edit at the same time. They will be able to make changes or modify route plans or work schedules simultaneously. Keep in mind that dispatchers need to be editing seperate routes and that changes made by dispatcher 1 will be reflected in the plan of dispatcher 2 only after dispatcher 1 hits the “Apply changes” button.

Best fit
You can also drag the order or task to the left of the grid, drop it on the team member’s name and OptimoRoute’s intelligent algorithm calculates instantly the most efficient and optimized position for the order within the route. With this time-saving and intuitive feature, users can enjoy a more streamlined and stress-free experience, letting the software handle the complexity while they stay in control.
Add unscheduled orders or tasks
If you have orders or tasks that have not been scheduled yet, you can also add them to routes using this feature. To access them, click on the arrow next to ‘Unscheduled Orders’ in the bottom-left corner to maximize the list. From there, you can easily drag and drop any order or multiple orders to place it anywhere on the timeline. The process works the other way around as well – allowing you to drag orders off the timeline and back to the unscheduled list.
Experiment and undo changes
You can easily experiment with different arrangements to find the optimal sequence of deliveries or services with the Undo and Redo buttons. You can also discard all changes you made within an editing session by clicking on the “Discard Changes” button. This functionality allows you to fine-tune your routes with ease and quickly roll-back changes as needed.
As you make changes, OptimoRoute will recalculate and optimize the routes in real time, allowing you to instantly see the impact of your adjustments on the overall route plan. You can quickly evaluate the effects of your changes and continue refining the routes until you achieve maximum efficiency.
Save and Apply Your Optimized Routes
Once you are satisfied with the adjustments you have made, save your optimized route plan by clicking on the “Apply changes” button located above the timeline. Your manually-modified routes are now ready to be sent to your team.
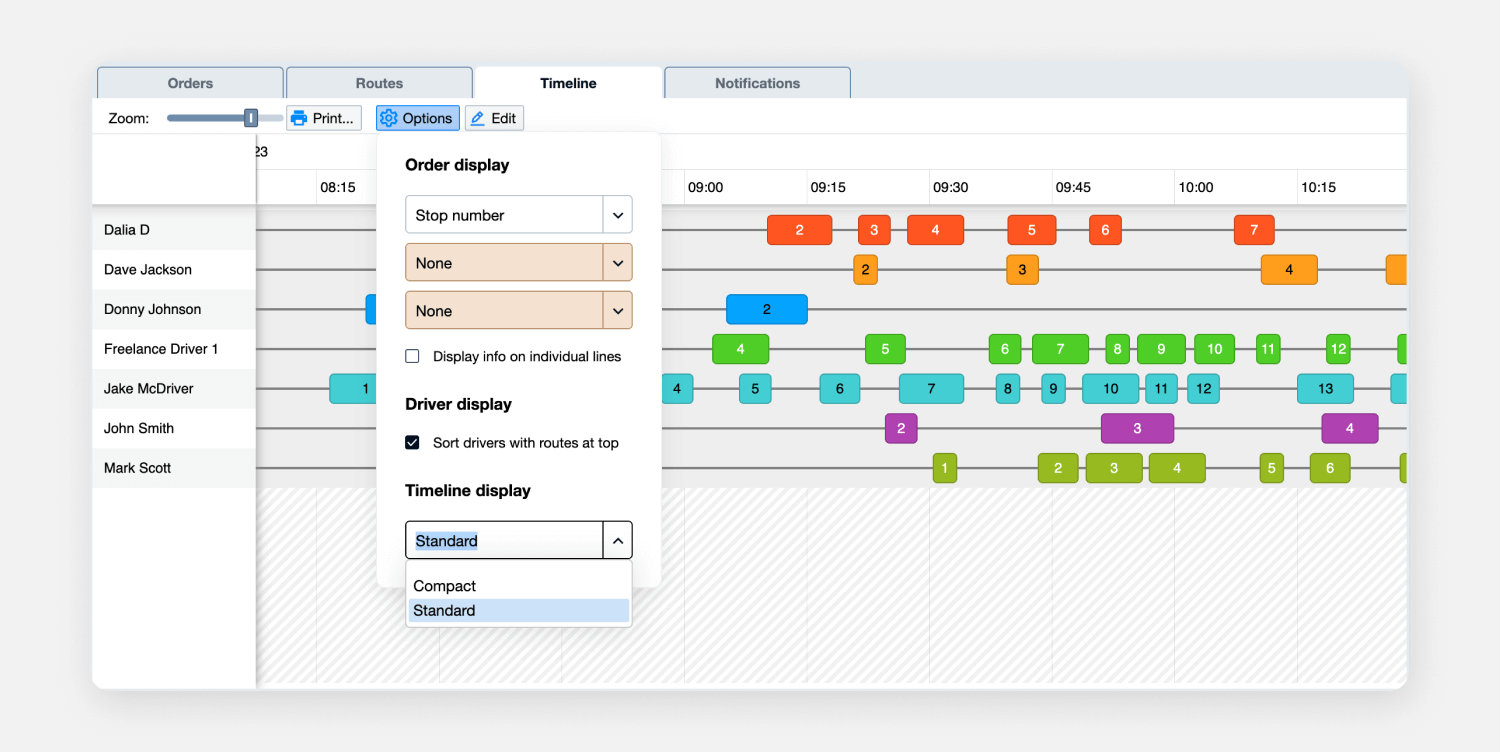
TIP You can also adjust your timeline view. Decide how tall you want your timeline cards to appear. This option can be found in the “Options” button in the timeline view. In the same pop-up screen, you can choose what information you want to see in the order box.
TIP You can also choose what information you want to see in the Unscheduled Orders list for each order or task by accessing the list and clicking on the cog icon at the top.

Learn more by watching our Drag & Drop webinar.
Alternative to Using Drag & Drop
There is an alternative version for manual modification of routes. Instead of using the Drag & Drop feature on the timeline, you can also access stop numbers of orders by double-clicking on the order in the grid or on the map. This will bring up the Edit order window.
If the order is already scheduled you will only be able to modify the driver/vehicle and stop number. Make the necessary adjustment and click Save.

If this is a new order that has not yet been planned, set the driver/vehicle and stop number by checking the Manual Scheduling checkbox.
When an order is manually edited and the fields Resource and Stop number are changed, the system will remove the order from the old route and insert it to the new route at the specified stop number. The system does not re-optimize the stop order in the changed routes automatically. It is also important to note that the system will not enforce constraints (like driver work time, vehicle load capacity) during manual route modification.
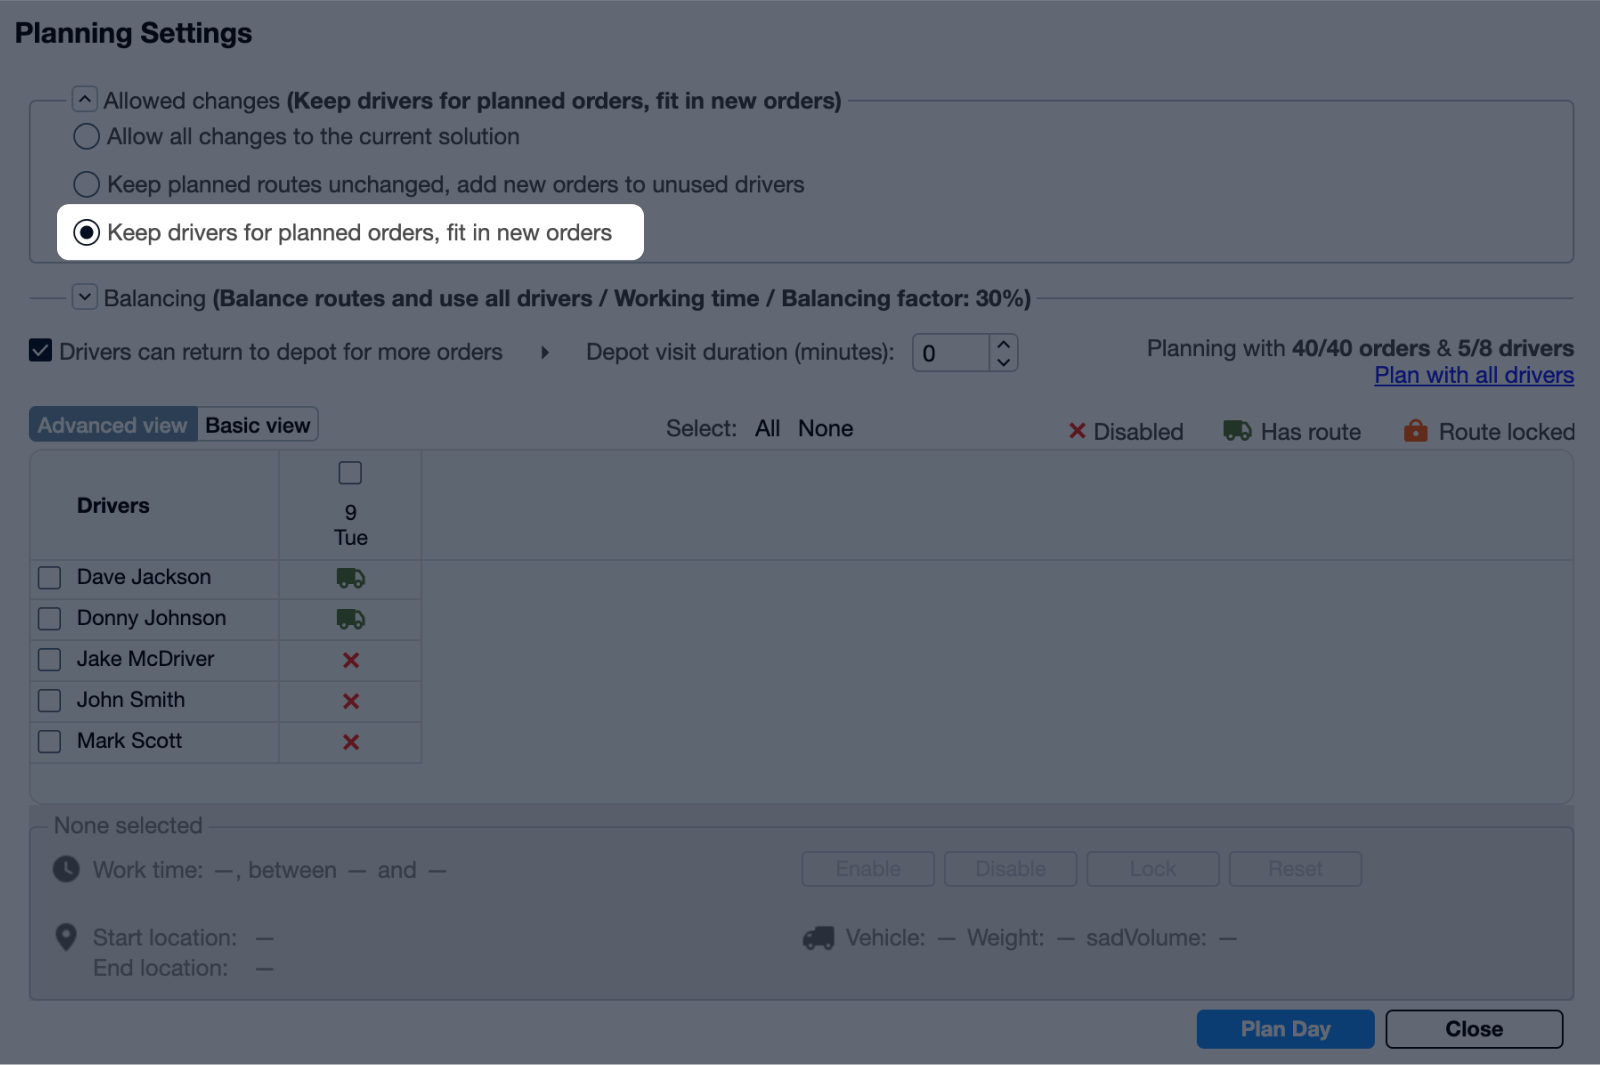
There is an option to re-plan the orders without changing the drivers/vehicles for already planned orders (please see the screenshot for details on how to run the optimization with this restriction) – only the stop order inside existing routes will be changed (and unplanned orders will be inserted). You could use this option after making manual changes to the routes for polishing out the routes.
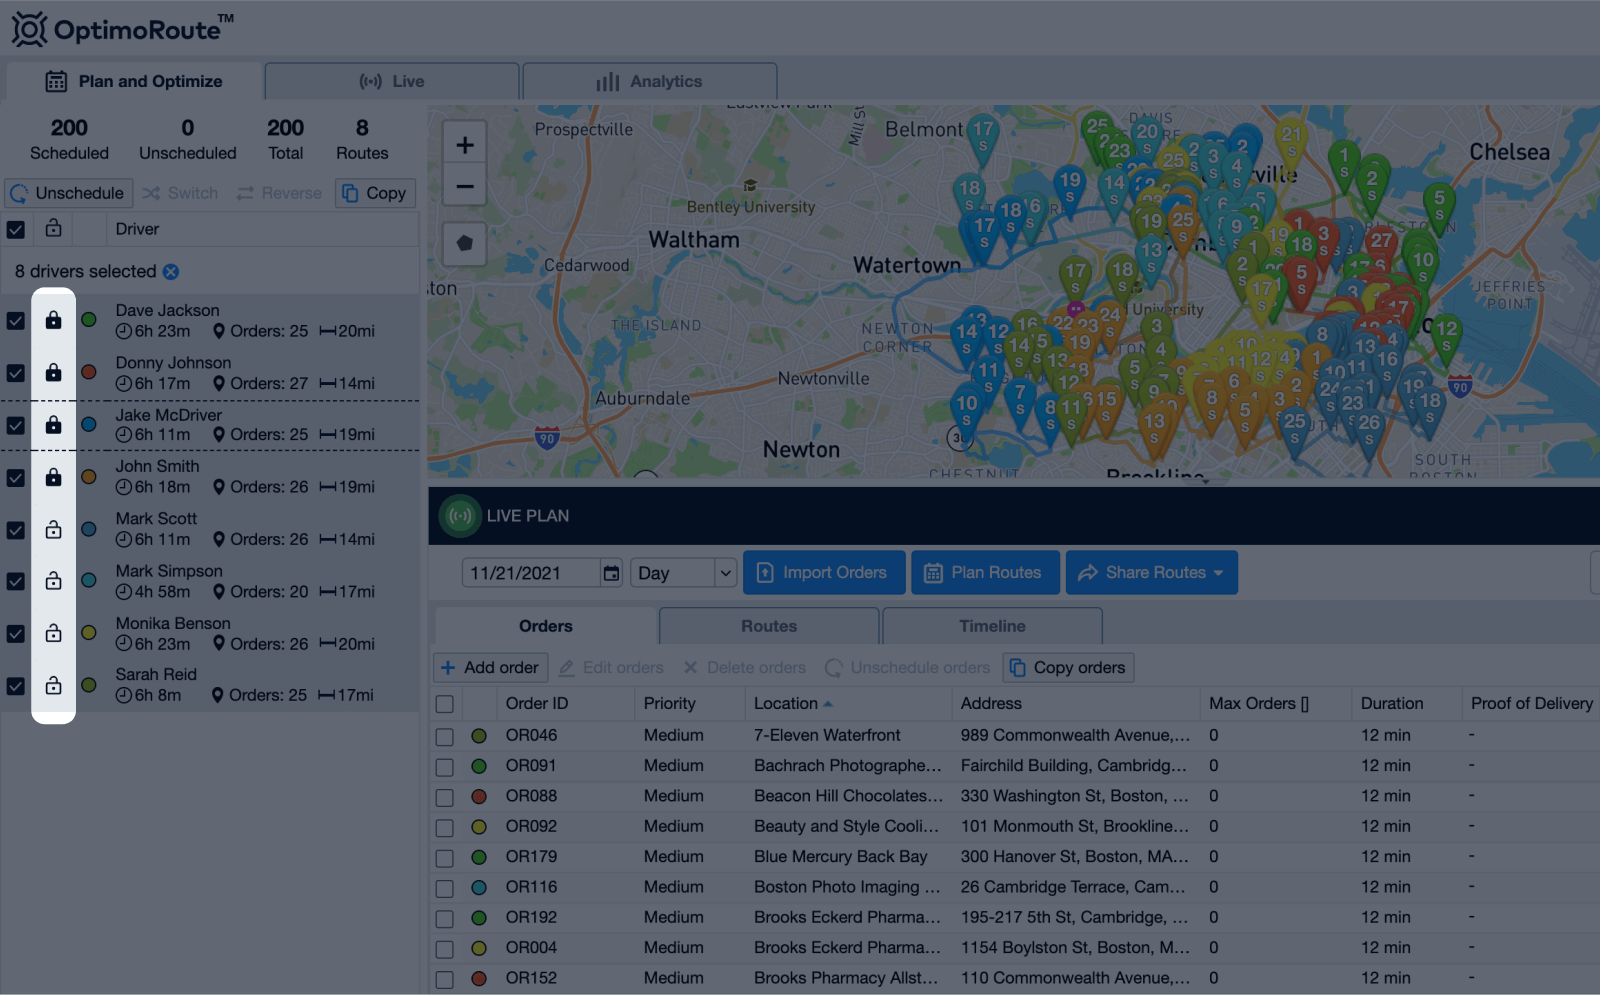
If you manually add an order and want to optimize a new route for only a portion of your drivers, you can lock the route of specific drivers in the route tab under the map. By locking a specific driver(s) you can change and optimize any new orders that have been added, while maintaining those routes that you are satisfied with. To initiate the lock driver feature, simply click on the lock to lock a specific driver.
However, please note that if during manual route modifications some constraints were broken (for example if you created a route that takes longer than the specified driver work time), replanning the orders could result in some orders being removed from the route. These would have to be manually planned/added to a route.