OptimoRoute’s Proof of Delivery feature lets your business capture real-time proof of completion information and send it to customers. Use the feature to improve accountability, increase customer satisfaction, and accelerate operational efficiency. It’s a Pro feature – click here to upgrade your account.
The Proof of Delivery feature collects information via the OptimoRoute Mobile Application, which is automatically fed back into the OptimoRoute Web Application. The feature has 3 functions:

Activation and configuration
Administrators/dispatchers need to activate and configure Proof of Delivery in the OptimoRoute Web Application.
Go to Administration→ Settings→ Proof of Delivery, and edit the options shown below.
- The 3 functions – Notes, Signature, Photos – can be used for different order types: Delivery, Pickup, and Task.
- You can also use the 3 functions for Failed Orders.
- Use the dropdown menus to enable or disable each function for each order type.
- Each time you choose Enabled, you can also make the function Required by selecting the checkbox. This way, the driver must collect this Proof of Delivery information before the order can be marked as complete.
Using Proof of Delivery in the Mobile App
For information on how to install and use the Mobile App, click here.
Drivers collect the Proof of Delivery information that has been enabled/required within the Web application.
- Click on Start service, then you will get the option to add Proof of Delivery information by clicking on +ADD or Complete.
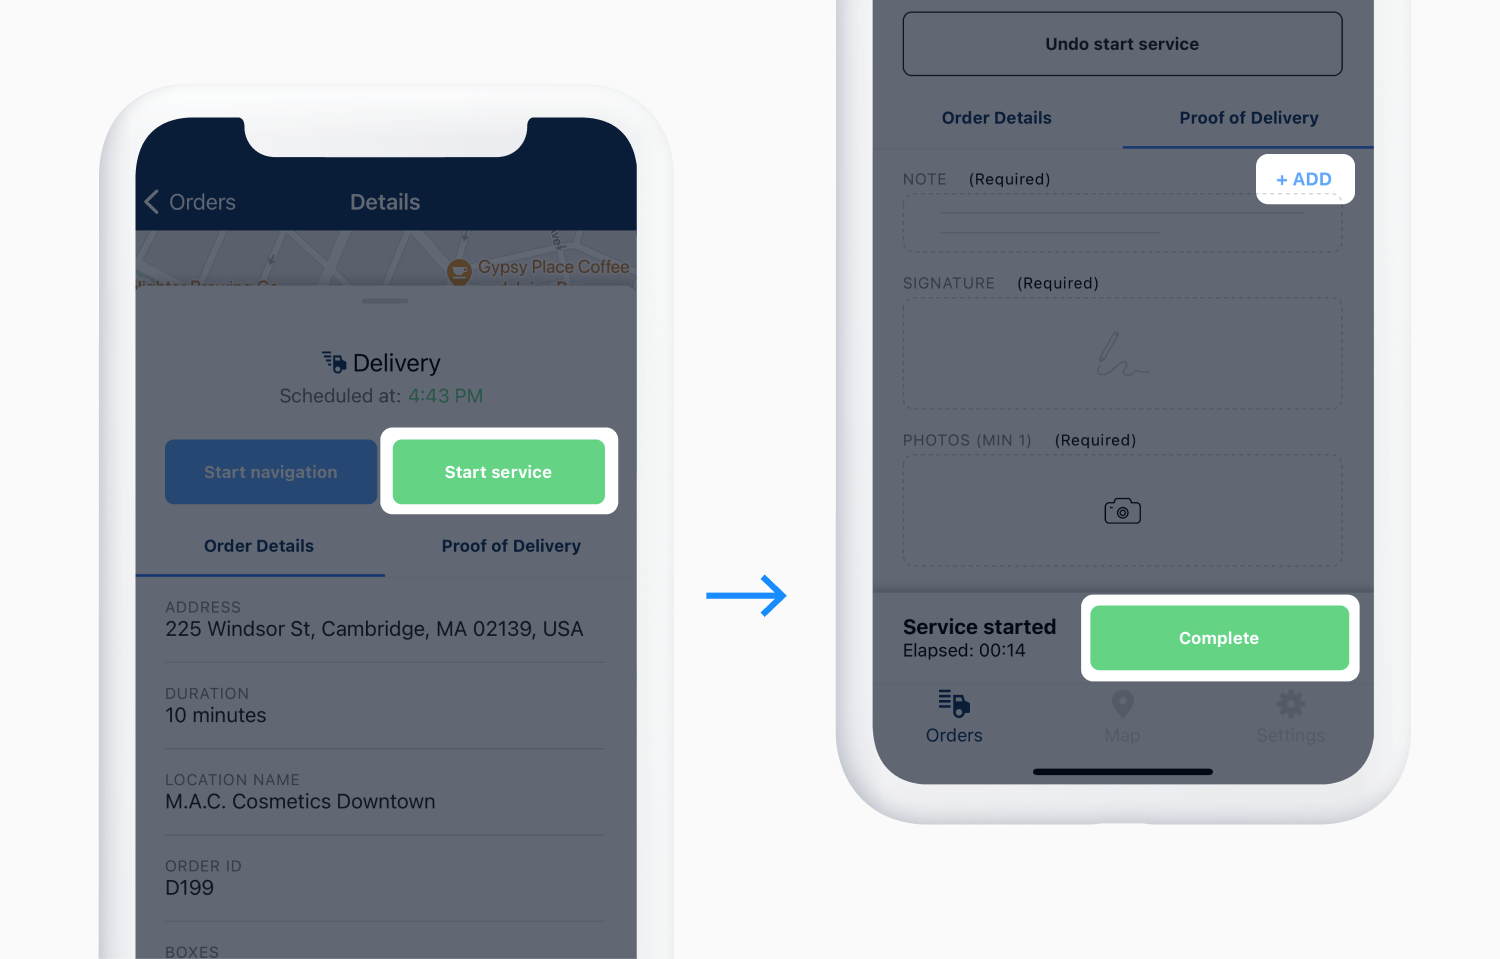
- Enter the desired text into the NOTE field.
- The customer can sign the SIGNATURE field with their finger.
- Tap to take or upload an image for the PHOTOS field.
- Slide to complete returns you to the Order list.

- If you want to edit the information collected – open the order, tap on Proof of Delivery and click Edit.
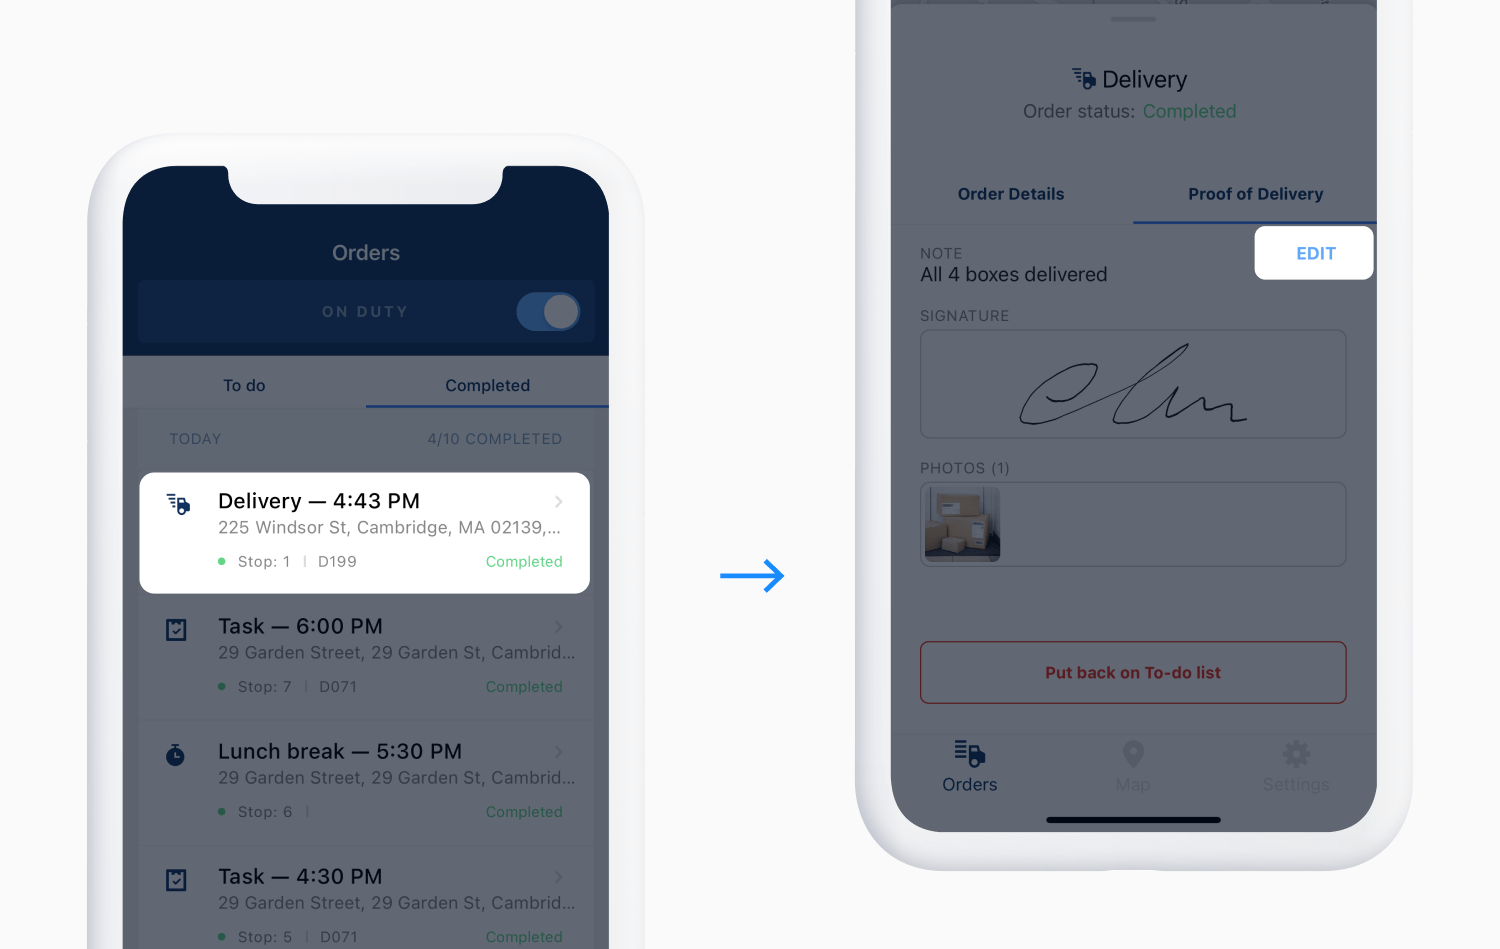
Here is how the entire process looks:
Viewing and downloading Proof of Delivery information in the Web App
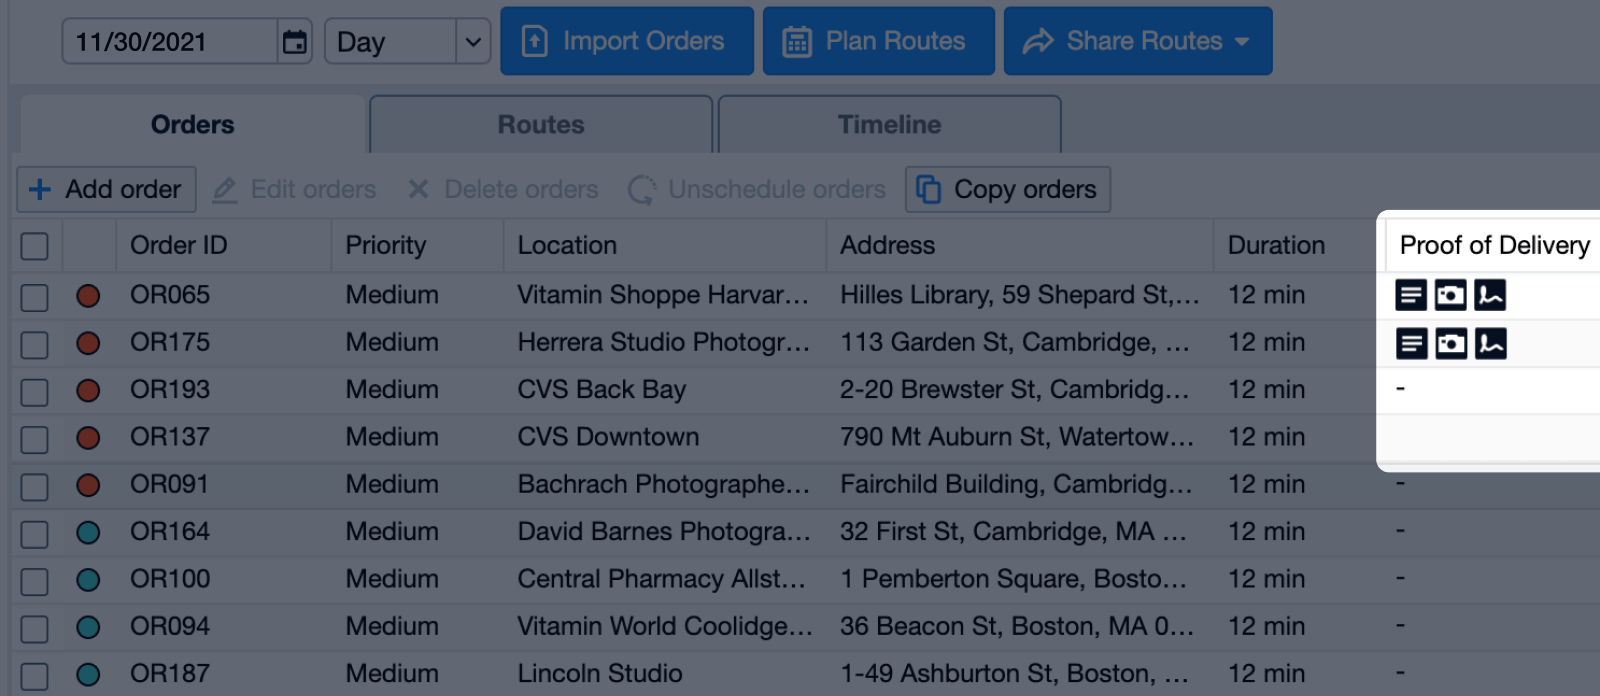
There are two ways you can view the Order details window with information collected for each order on the current date or any date in the past:
- In the Live tab: Double click on the order in the Order grid.
- In the Analytics tab: Go to Plan History and double click on the order in the Order grid.
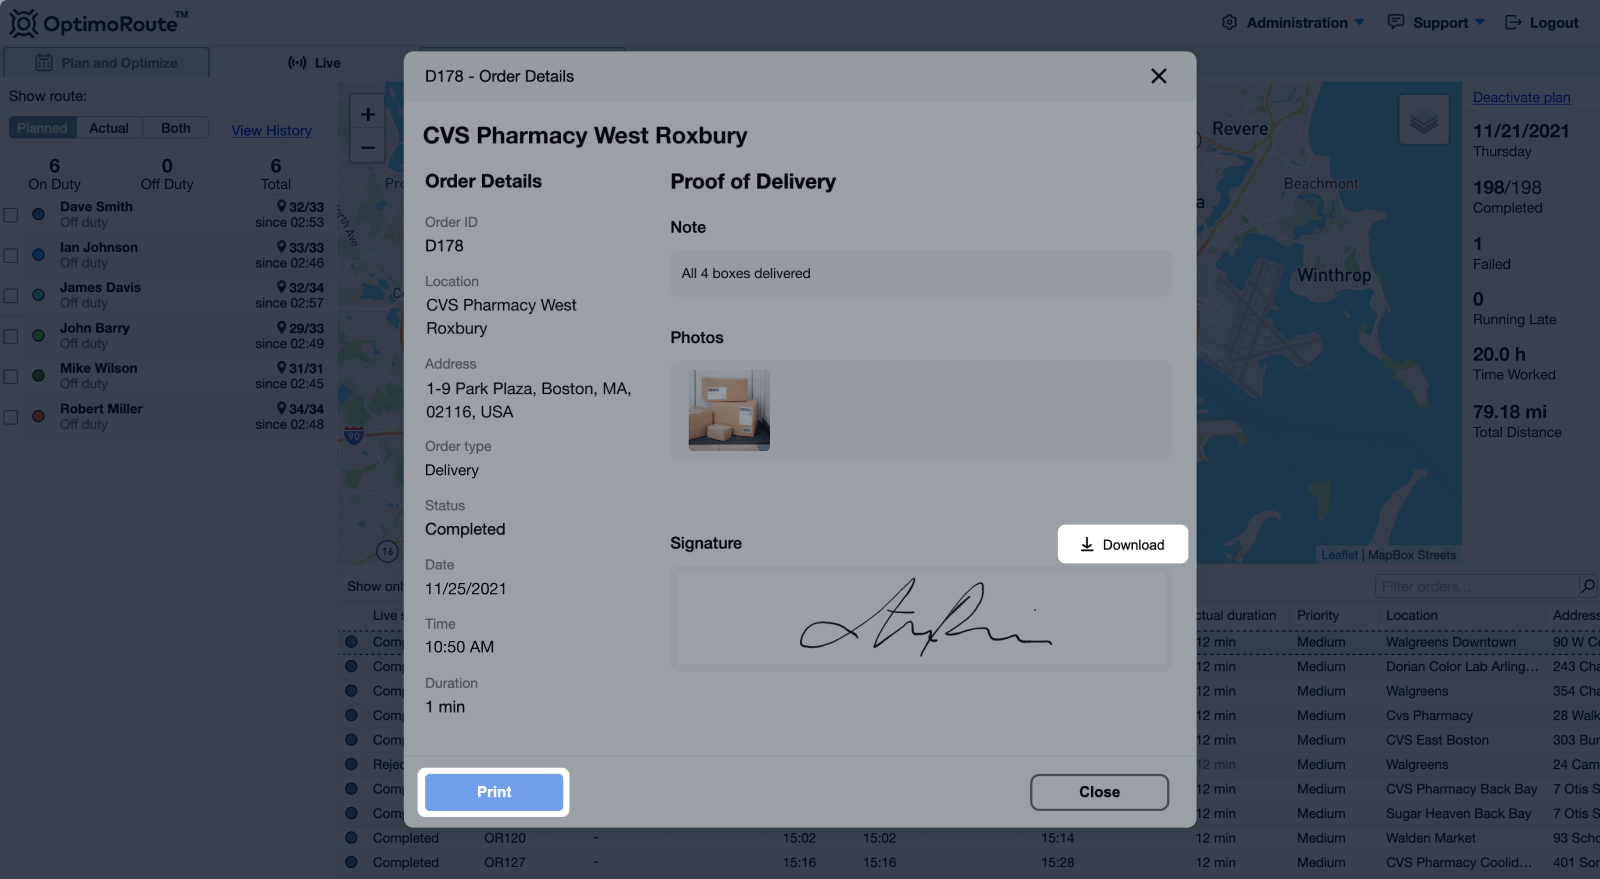
If you want to send Proof of Delivery information to a customer – open the Order details window as explained above:
- To download a report with all available Proof of Delivery information for that order: Click on Print, and select Save as PDF.
- To download partial Proof of Delivery information: Click on Download, to the right of each function.
When and where can the customer see their Proof of Delivery information?
If you are using Realtime Order Tracking to send notifications to your customers, you can decide if you want your customer to see their delivery or service information by enabling it under Realtime Order Tracking feature settings:

If you enable this option, alongside their real-time ETAs available through Realtime Order Tracking feature, upon completion, the customer will be able to see the delivery/service information.